Sie sind nicht angemeldet.

Lieber Besucher, herzlich willkommen bei: We-Mod-It | Das Forum von Moddern für Modder. Falls dies Ihr erster Besuch auf dieser Seite ist, lesen Sie sich bitte die Hilfe durch. Dort wird Ihnen die Bedienung dieser Seite näher erläutert. Darüber hinaus sollten Sie sich registrieren, um alle Funktionen dieser Seite nutzen zu können. Benutzen Sie das Registrierungsformular, um sich zu registrieren oder informieren Sie sich ausführlich über den Registrierungsvorgang. Falls Sie sich bereits zu einem früheren Zeitpunkt registriert haben, können Sie sich hier anmelden.

ThomasB

Neu Hier!

  • »ThomasB« ist der Autor dieses Themas

Beiträge: 26

Registrierungsdatum: 12. September 2014

Wohnort: Frankonia

  • Nachricht senden

1

Freitag, 12. September 2014, 13:13

Project "AcryCon" Acrylic HPTX/24 Threads Dual CPU and Dual Loop Casecon


First of all a huge thanks to this guys, you're awesome.

Thanks to Mundi Valur from Icemodz, for providing me with high quality cables, LEDS, cable management and other stuff.


Thanks to Andreas Klassen from Aquatuning, for providing me with watercooling parts that make the dual loop happen.


Thanks to Lily and Vincent from Bitspower for the best fittings and blocks.


Thanks to Matthias Brömel from Moddingstylez for providing me with awesome films and decals. You were always a person of contact who is there if you need a little help.


Thanks to Peter from EK Waterblocks for providing me with coolant, ddc housings and an hd tubing kit.


Thanks to Bundymania for interfering a lots of contacts and providing me with a lot of your knowledge about watercooling.


Please click the Banners to get transfered to the respective pages.


Index:


1. Foreword.


2. Little introduction


3. The ideas and concept.


4. Hardware planned


5. And its realization


Hello Folks,


1.Foreward:

Im currently working on a custom case, from the scratch and of course i didn't want to withheld it from
you. This work log will be kept in english, due to sponsors and friends all
around the globe. It also makes it easier for me to copy it to english forums.
Please be tolerant if i do any mistakes in language, its not my native one.


Ill answer any questions in German too.

Ich beantworte natürlich jede eurer Fragen auch in Deutsch.


2. A little introduction:


Some words about myself: Im Thomas, 23, from the centre of Germany and studying
business economics right now. Since i got all the tools and skills i need for a
casecon, besides a laser, i wanted to give it a try. Ive modded some classic
Cases from Lian Li and Thermaltake before, but the idea to build a case on my
own, is in my head for a long time.


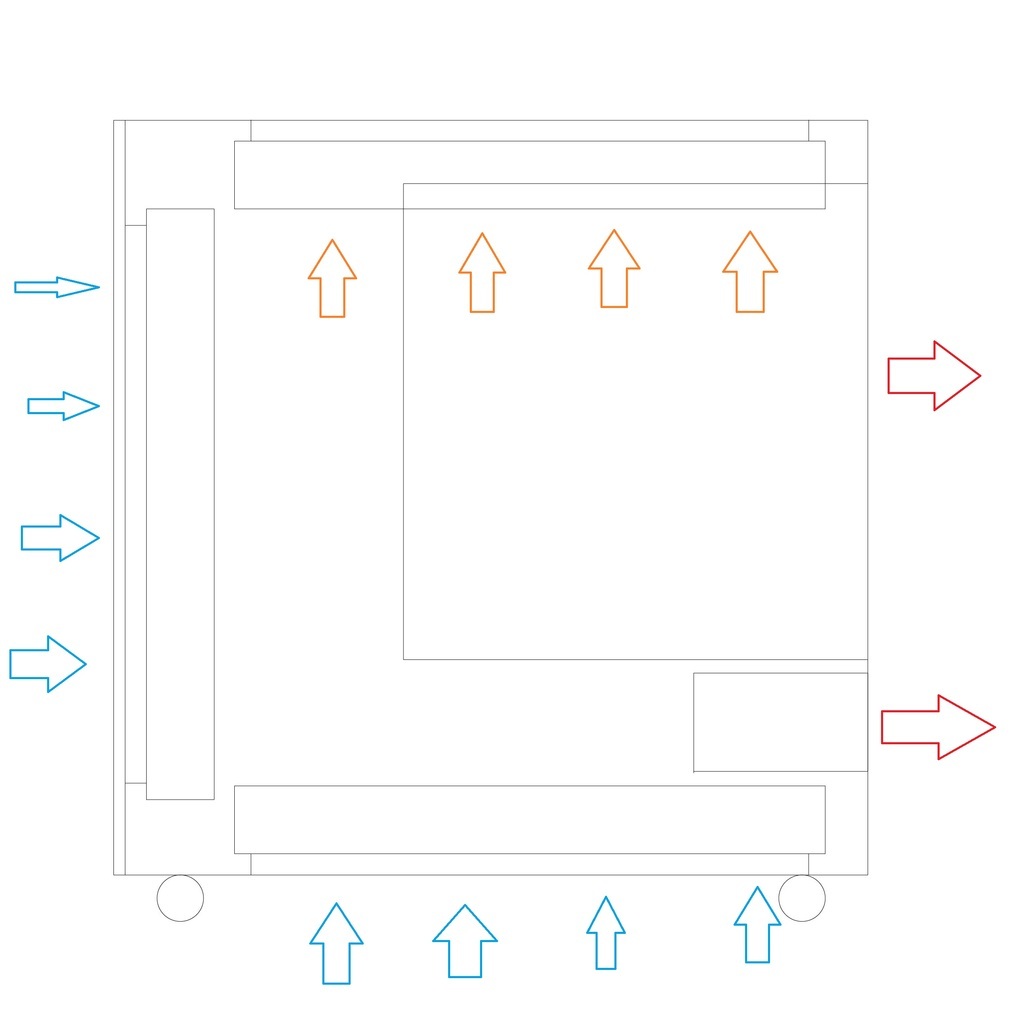
3. The ideas and concept:

The idea was to create a case, which fits to my furniture without having to spare on any feature a
premium case has. That means in particular, it should be of high quality, with
a good cable management and lots of space for my watercooling. I was looking
for a case on the common market, but there weren't any cases that are simple in
design, with a good cooling and as angular and slim as i’d like to have it. Sounds
like Caselabs, but it wasn't an option for me, even though superior
watercooling solutions, the appearance is not what i am looking for. I also
wanted it to be fitting straight to my needs without any more or less.


Some keyfacts/ideas:

- Using only acrylic and aluminium to keep it lightweight.
- Inverted HPTX/ATX Layout.
- Three seperate chambers for the radiators. Every rad gets fresh air from
the outside, and will exhaust it out oft he case without supply the others with
warm air.
- Cooling as quiet and low in temperature as possible, with the option for
quad SLI. Ill be able to cool my Dual Titan Setup, Dual CPU, Board and Rams
with less than 35° Watertemperatur under load while remaining whisper quiet.
- Having no more cable(s) visible than needed.
- Keep everything as edged and minimalist as possible.
- Dual Loop Acrylic Tubing, to have each Cpu, Dim, the two parted MB Block
and each VGA in another color.


When checking other modding forums, i got in touch with someone selling an EVGA SR-2 including two
Xeon hexa-cores. Whoever has seen this motherboard, its literally a monster,
knows that the case had to be appropriate.


To cut a long story short, i had to create something unique.

4. The hardware planned:


- EVGA SR-2
- 2x Xeon 5649
- A GTX Titan with very good overclocking results, cooled by Aquacomputer
Kryographics. Ill either go for a second one soon, or check out how the new GTX
980 will perform. At 1,21 V, my Titan is as fast as a 780 TI with medium
overclocking.
- Temporary 8 GB Ram of Mushkins Silverline 1333. Im open to any suggestions
what Rams will find ist place in the case. Currently im thinking of Corsair
Dominator for easy watercooling(holy they are expensive) or Kingstons Hyperx
Fury in white.
- A 480, 420 and 360 ST30 Radiator.
- Custom Reservoir.
- Two Laings DDC1-T with Phobya Tops.
- A lot of E-Loops and 3 PK2 by Noiseblocker
- Aquaero 5 LT to control my fans and pump.
- Corsair RM 650 Power Supply. Will get something new when i get a new VGA.
Maybe Superflower?
- Currently using an Intel M320 SSD, a bid outdated, problably heading for
Samsungs Evo. Same story here, im open to suggestions.

5. The realization:

How did i get started?
Good question. The initial idea, even before i wanted to build a one of a kind
case, was to modify my old Lian LI 2110A to make it fit HPTX. I ordered a Lian
LI D8000-3 Mainboard tray which is also the basic for this case.

And thats how things started, from the drawing board. There werent any
standards given but the size oft he tray.


Unfortunately i got twice of this kind of „special version“ tray.


Damaged/bent while shipping from UK to Germany :/

Since this trays arent made of thicker metal, it was quite easy to get it straight again though.

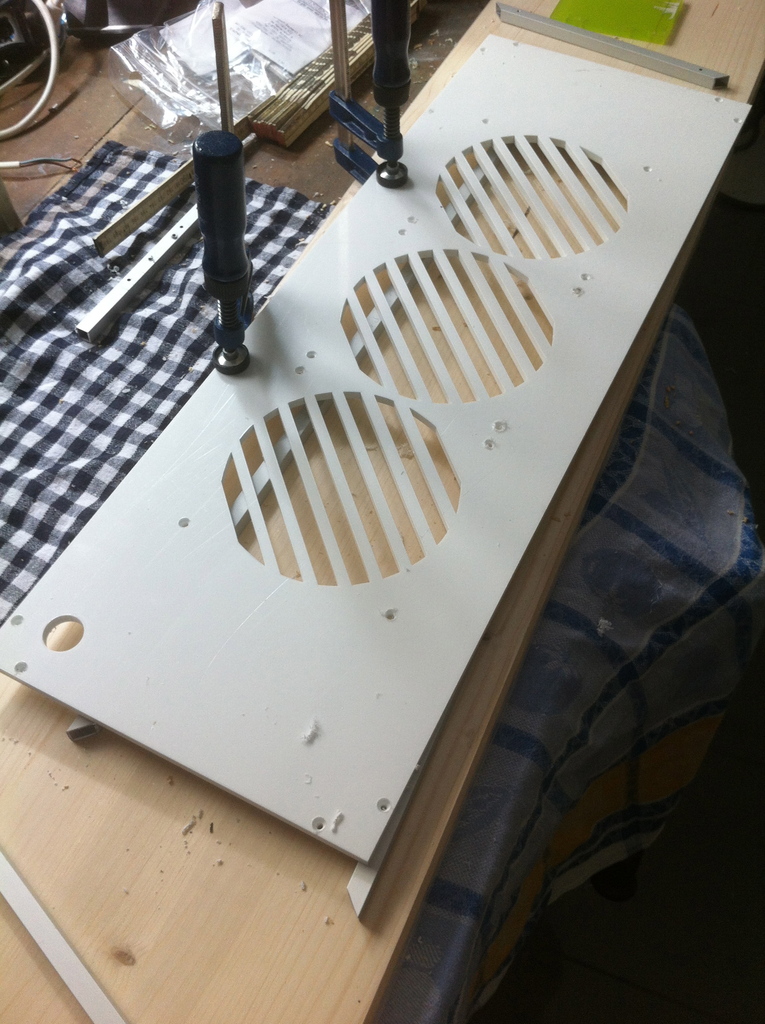
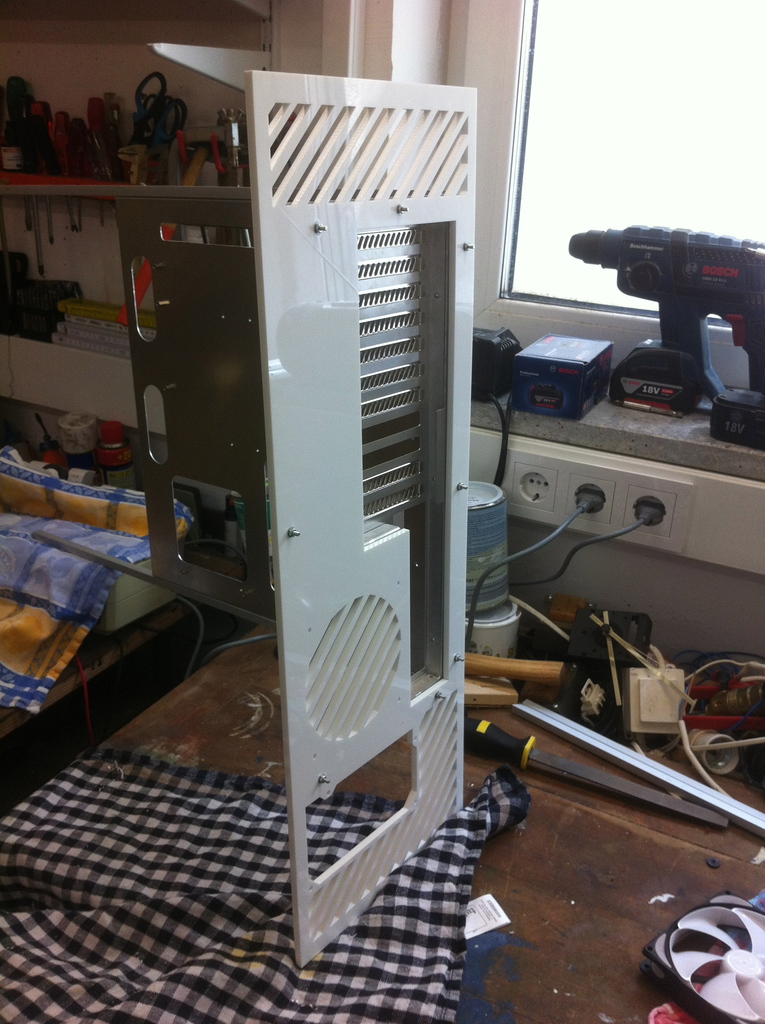
Back to computer work, i had to draw the parts in a standard, that could be used for laser cutting. I
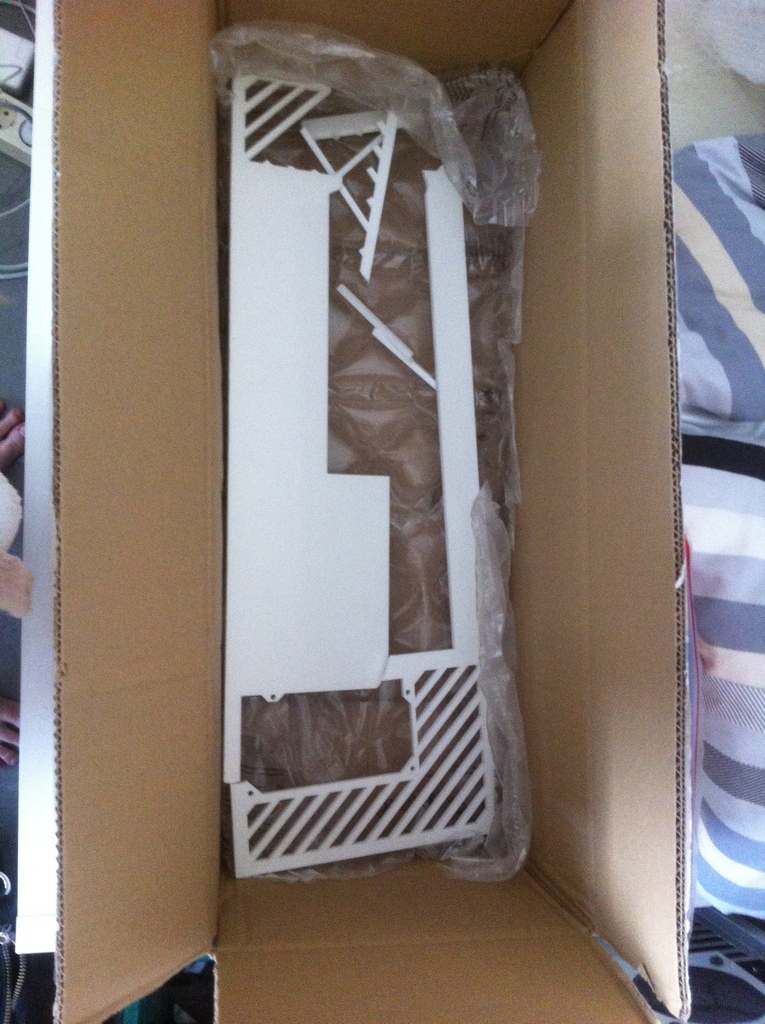
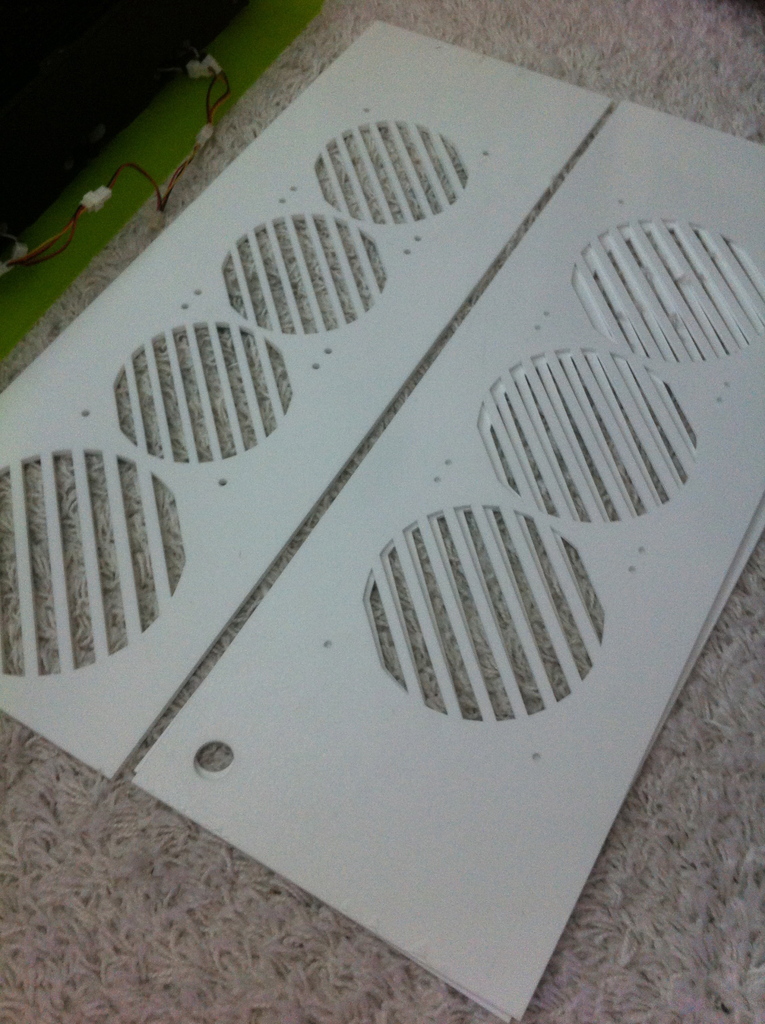
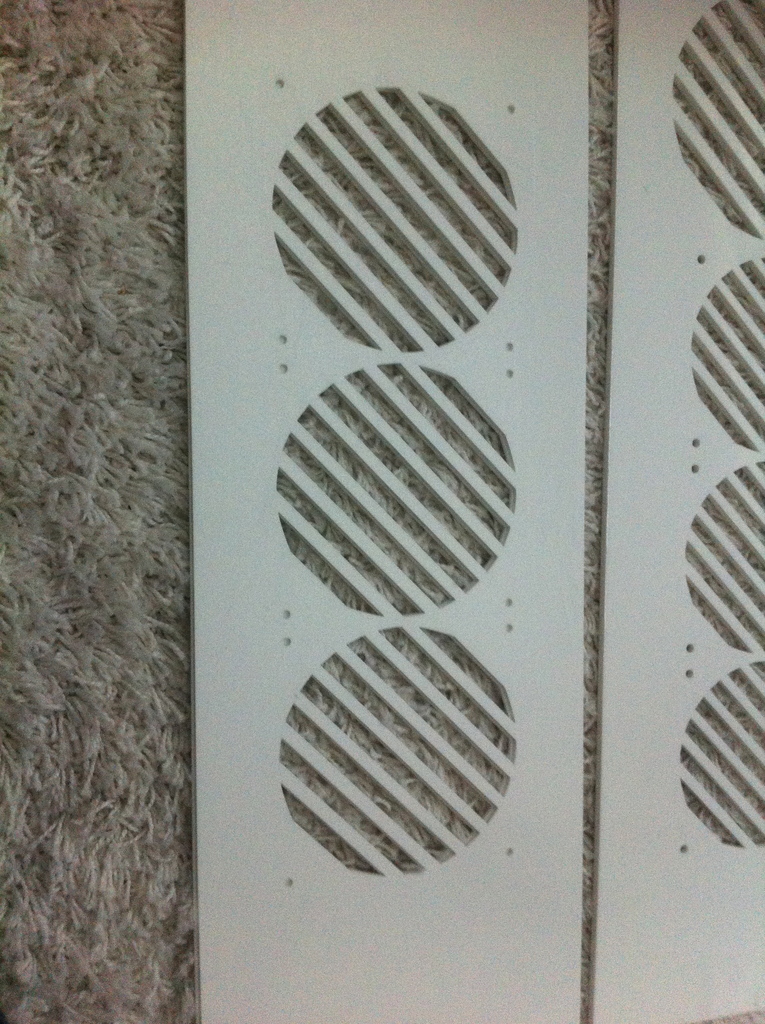
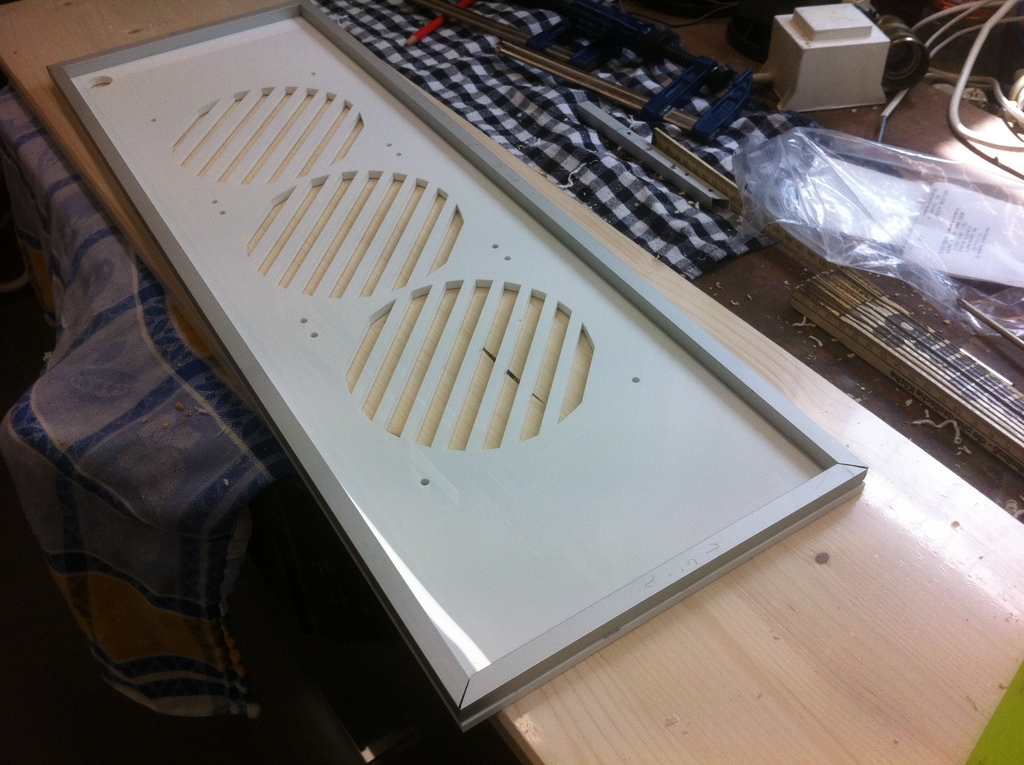
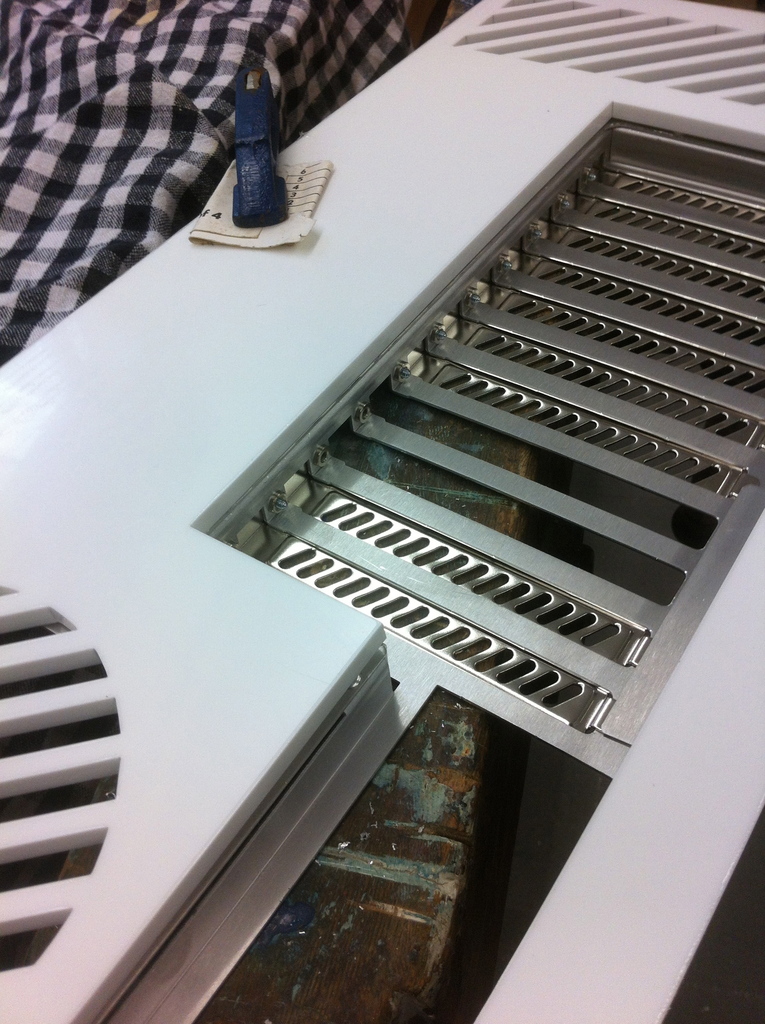
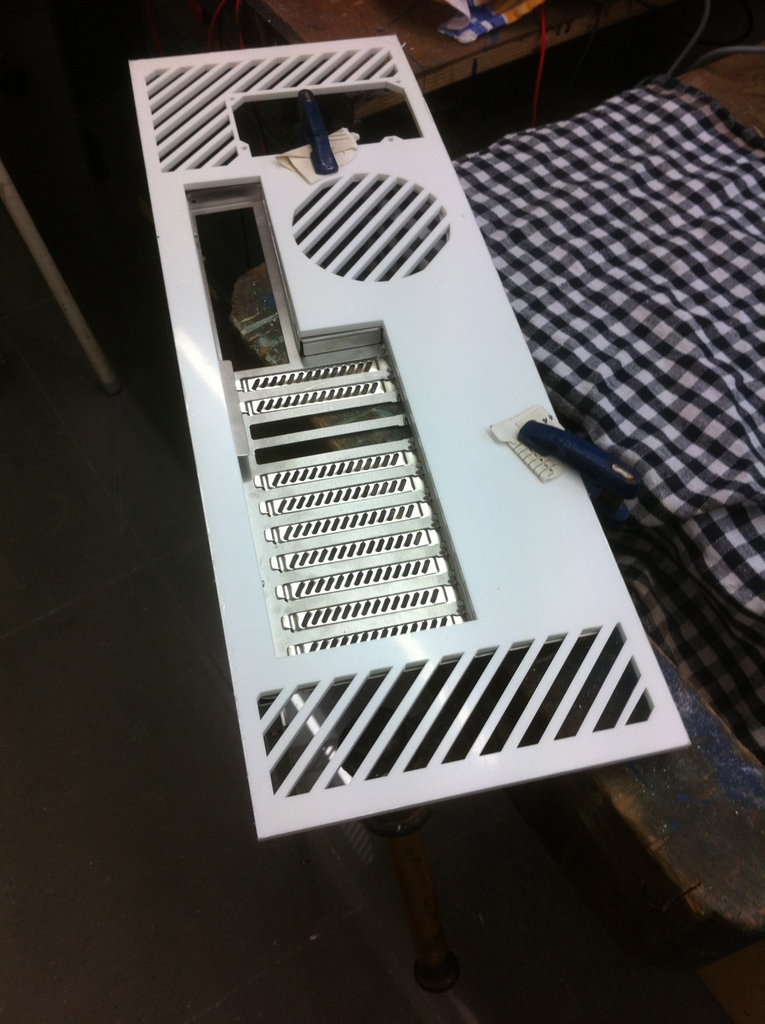
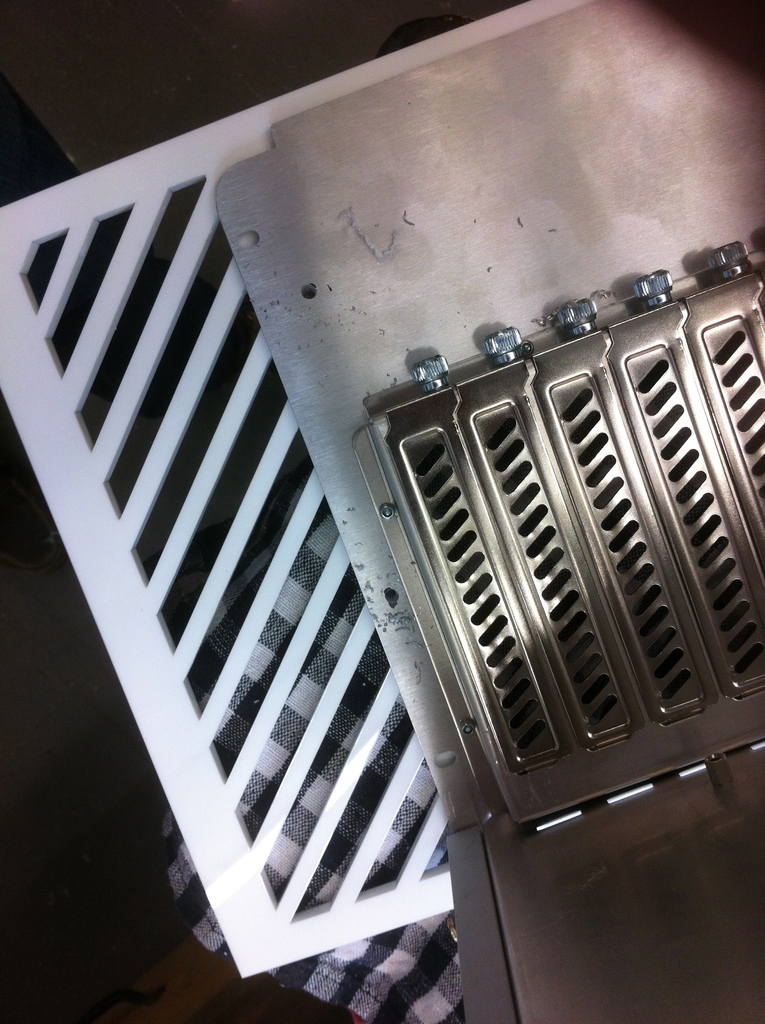
knew that the fan grid would be to complex do it with common tools.


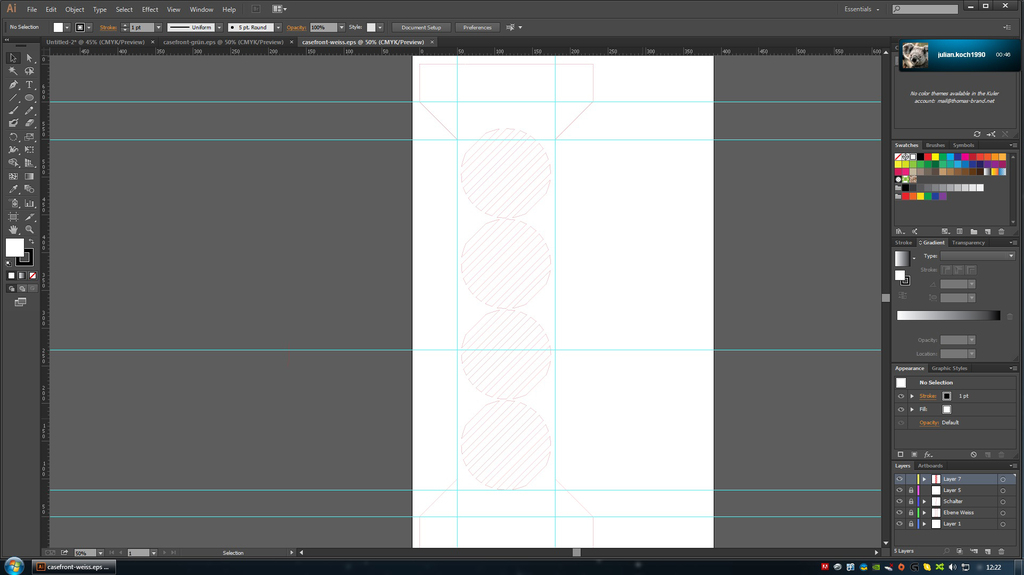
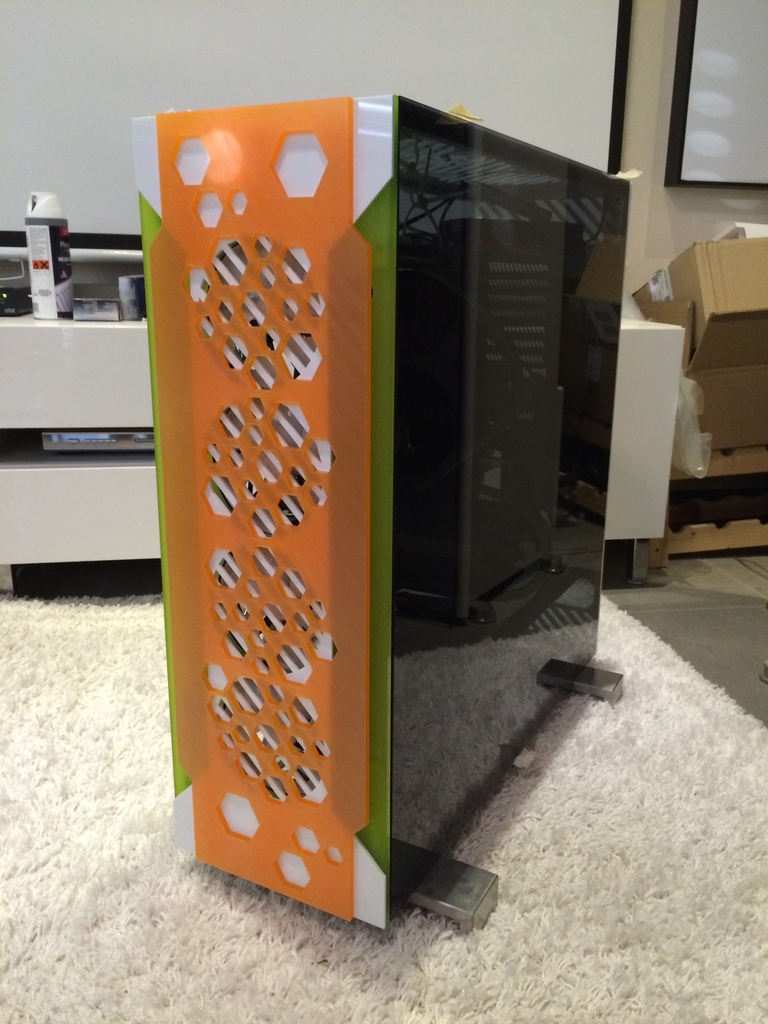
The first drawings followed... No Screws should be visible on front and window
side. A decorative screen was needed and first was also the last brainchild.


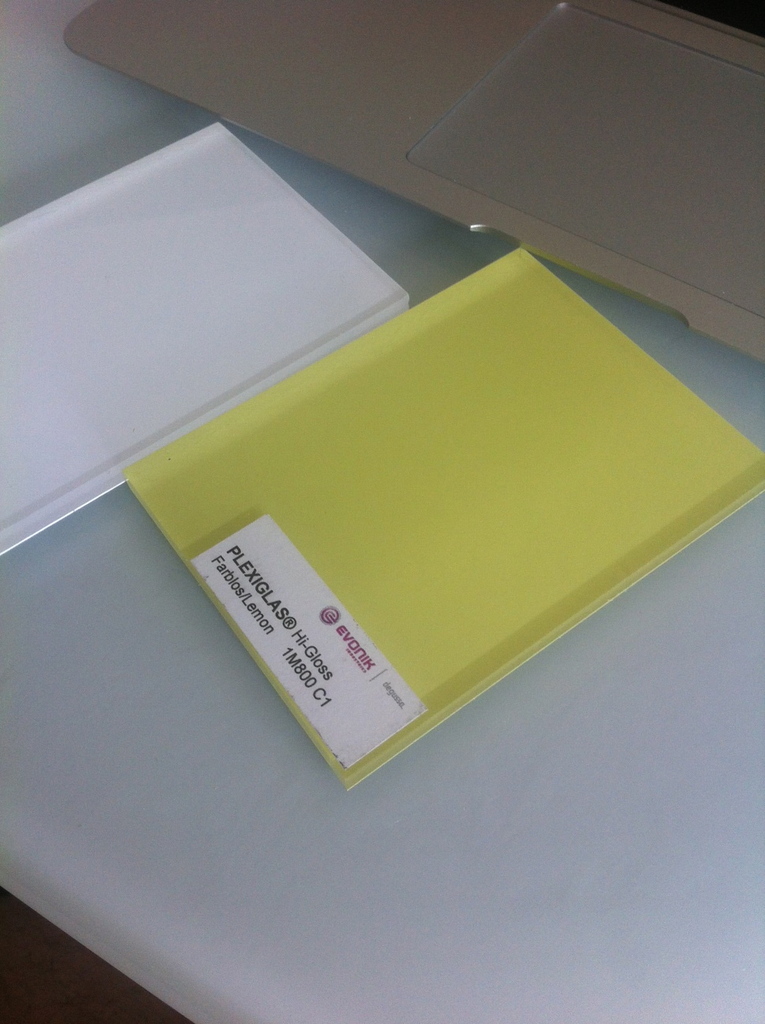
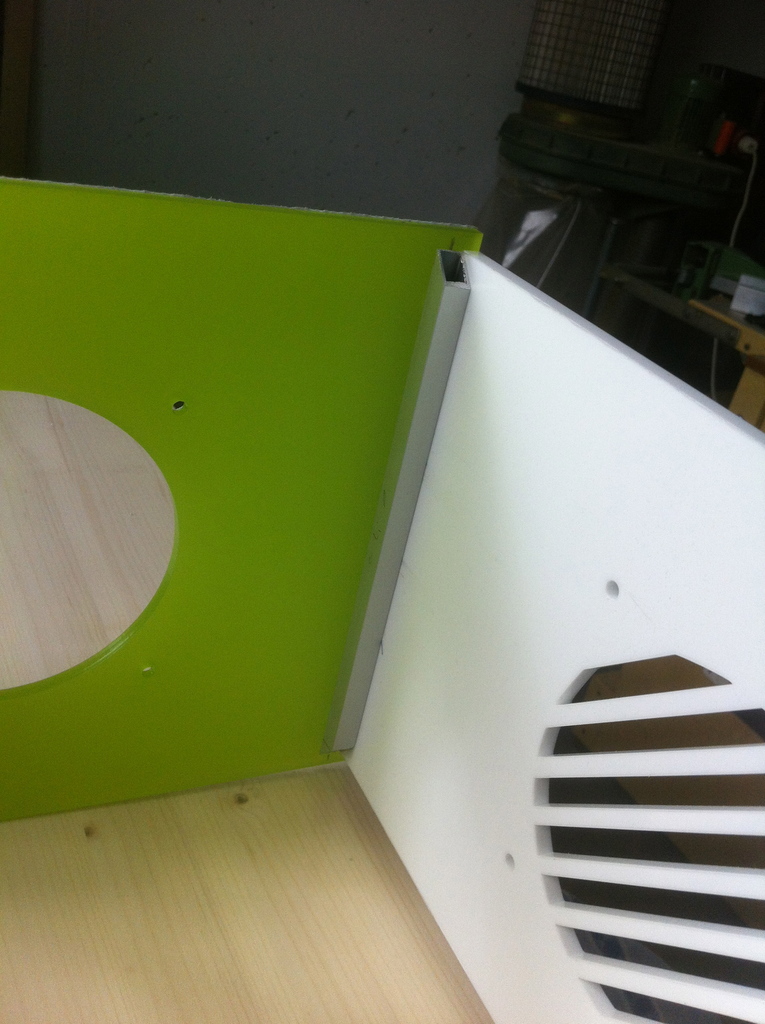
Some samples ordered and after first inspection i was sure, it will be themed
in a combination of glossy and matt „satinice“ acrylic. Last one is pretty
impressive, awesome haptic and beeing opaque.


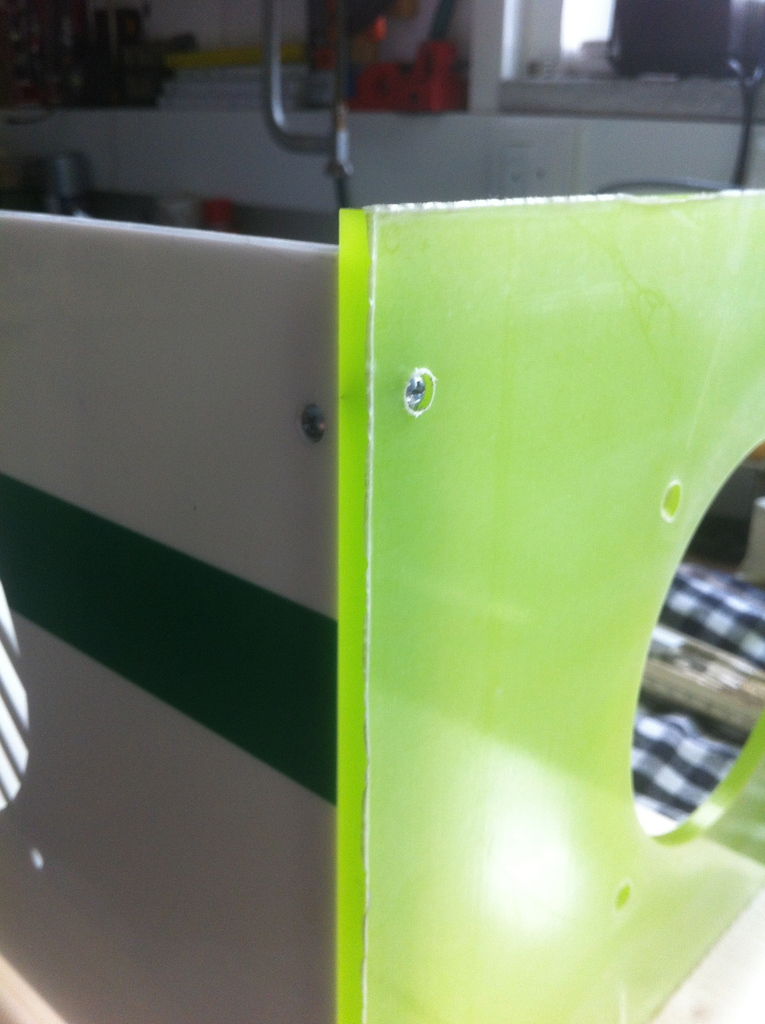
It felt like there are spreading 300 new Corsair 900d with an ROG Board kept in
all dark/red every month. Easy decision to use another color :D

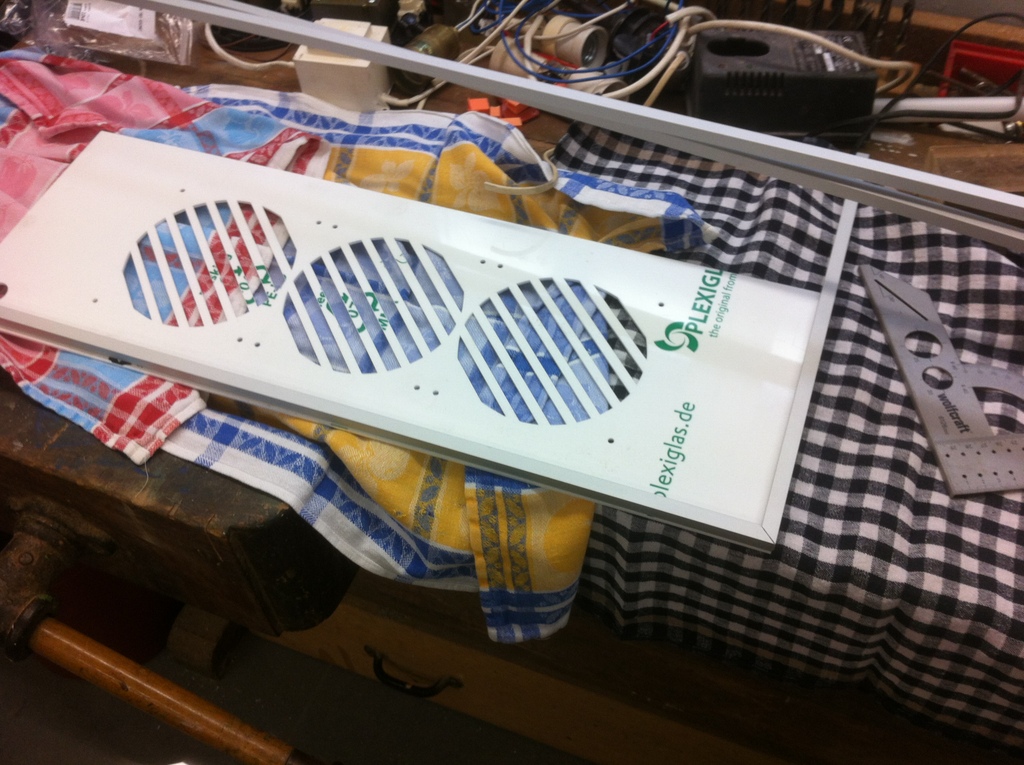
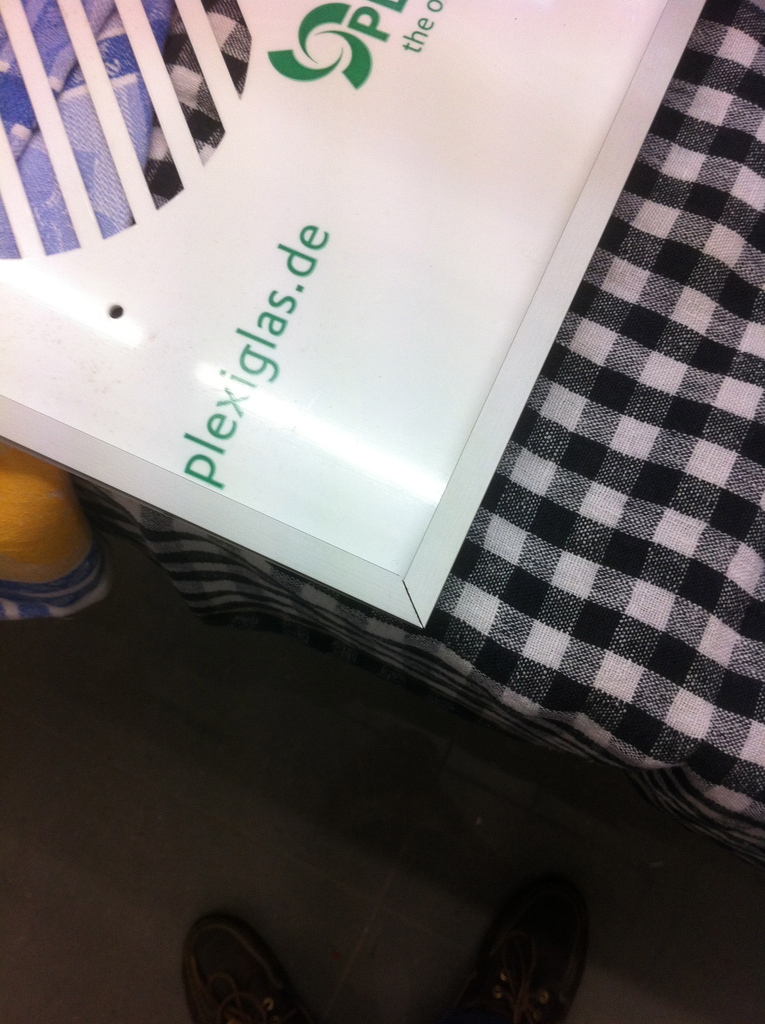
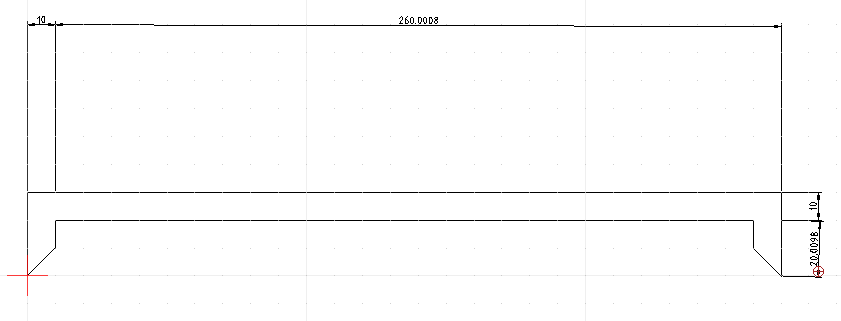
Other parts followed the same way. Draw in Illustrator, get them to lasercut in highgloss 6mm acrylic.


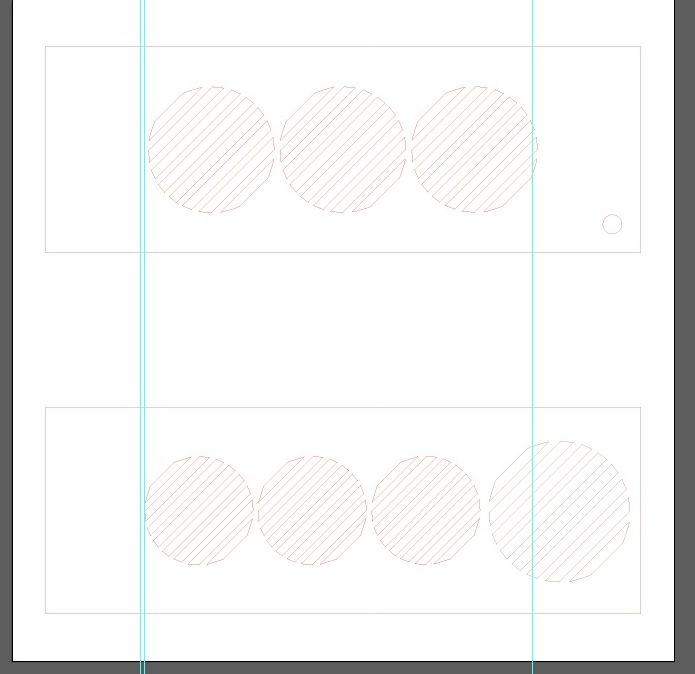
Fillport on top(20 MM to fit the Bitspower Fillport) and holes for a 420 Radiator. To keep everything flush-mount,
the top got lasered twice. The bottom is made to fit a 360 Radiator, and a 150
mm hole that the power supply gets the needed fresh air.


The back was rather complex. Using 8.5 cm for the top radiator, getting his
fresh air from the rear, and about 16 cm for power supply and bot radiator
exhaust. Addin’ holes for standard atx supply too.

A forced little pause again...


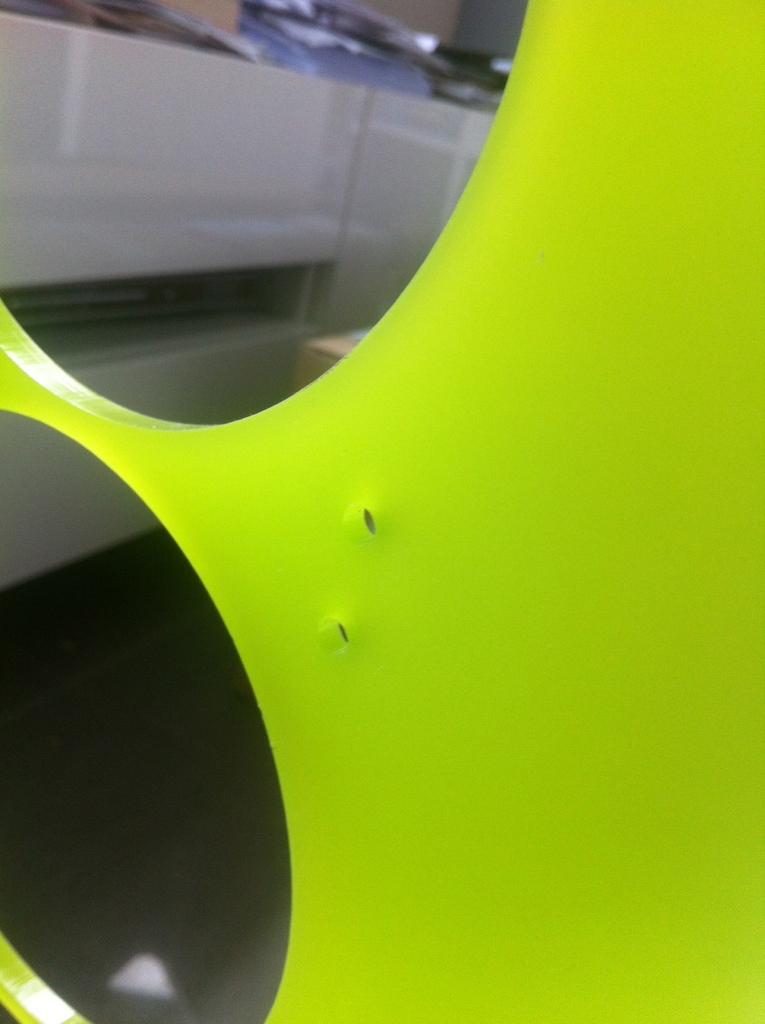
The other parts came fine,
so i had time to make a little trying on.


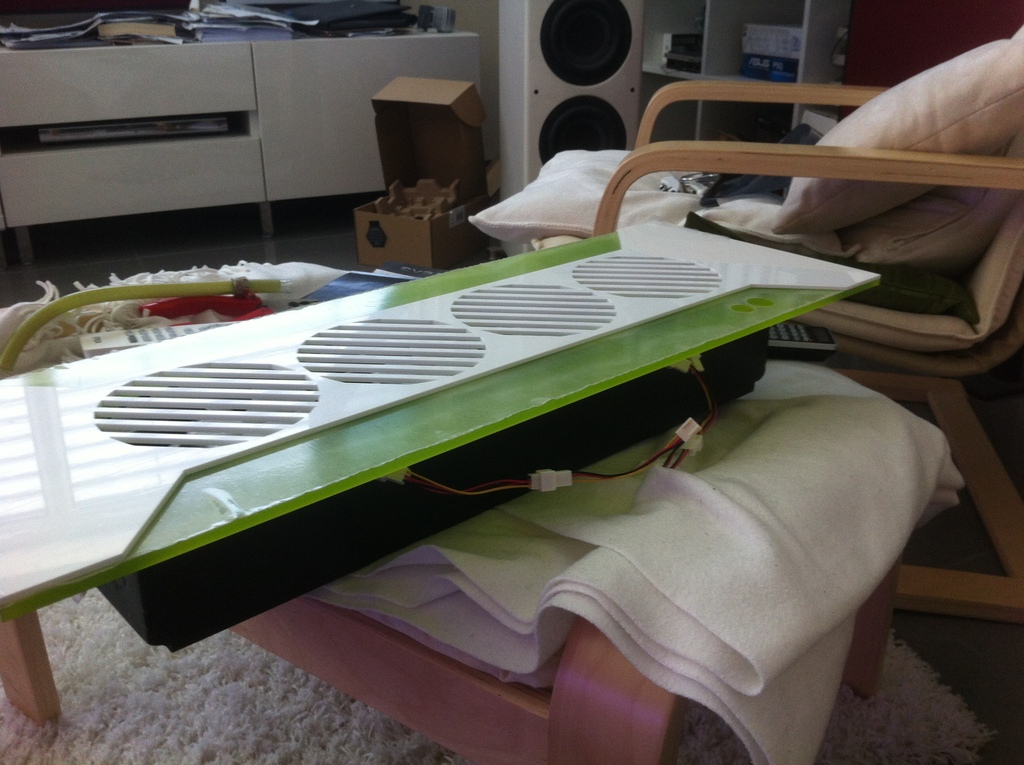
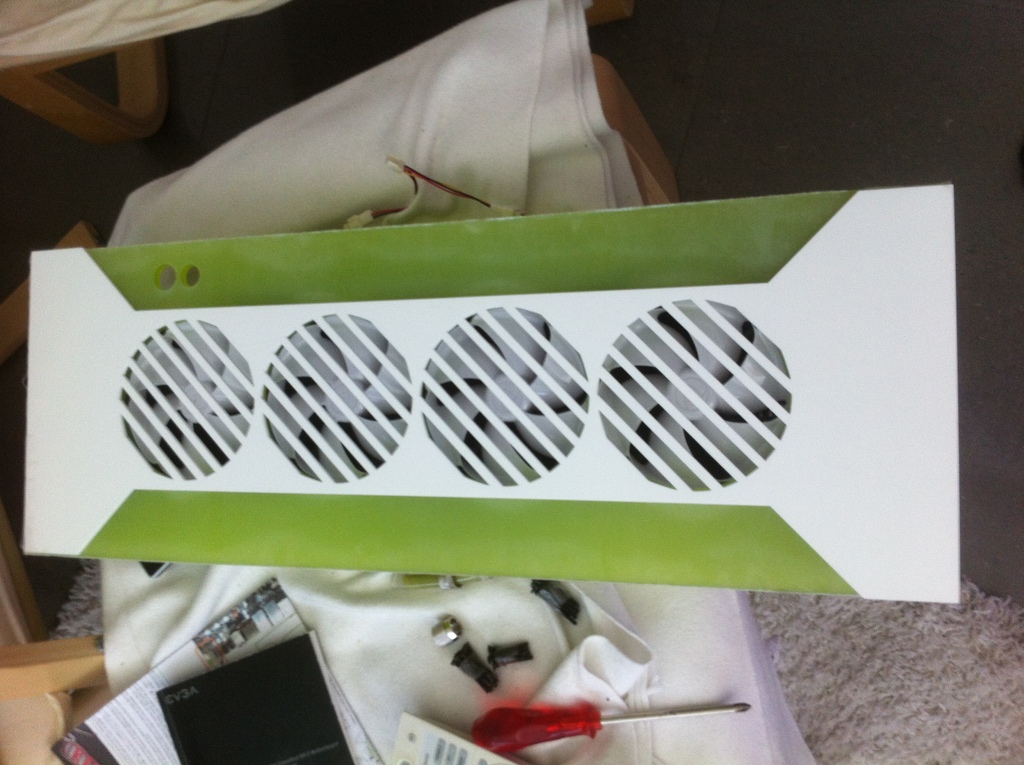
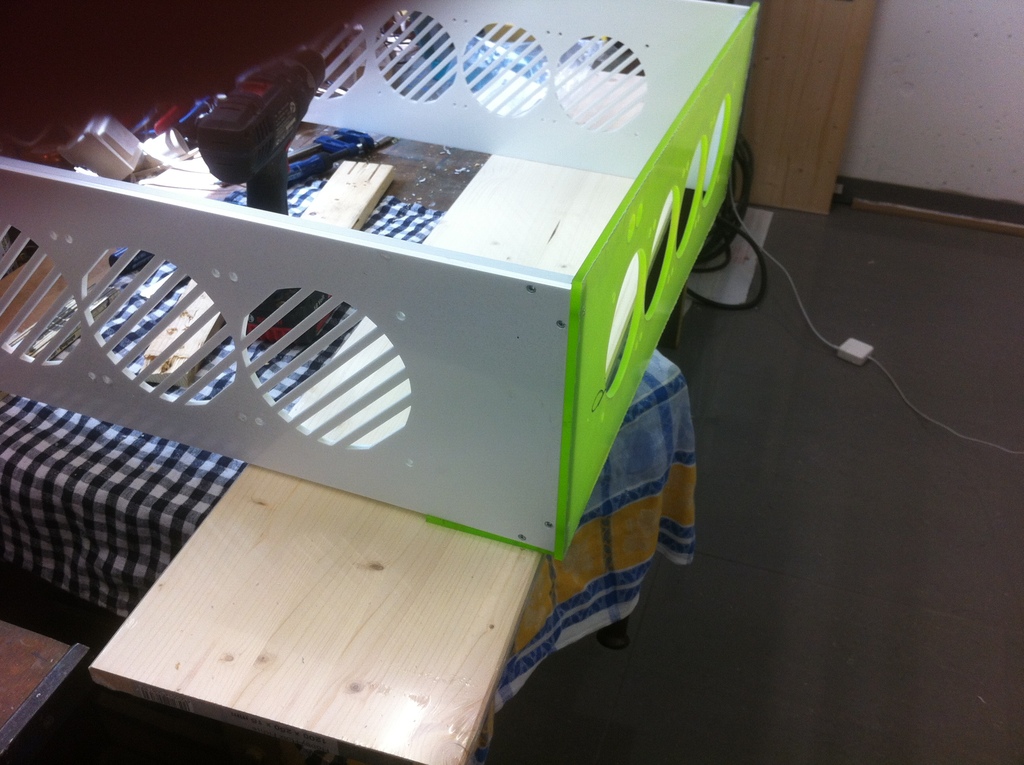
Feser 480(which will not be in the build), 4 eloop B12-2 and the front as it will look later. The
protection film is still on, so the green is not as shiny as it is in real.

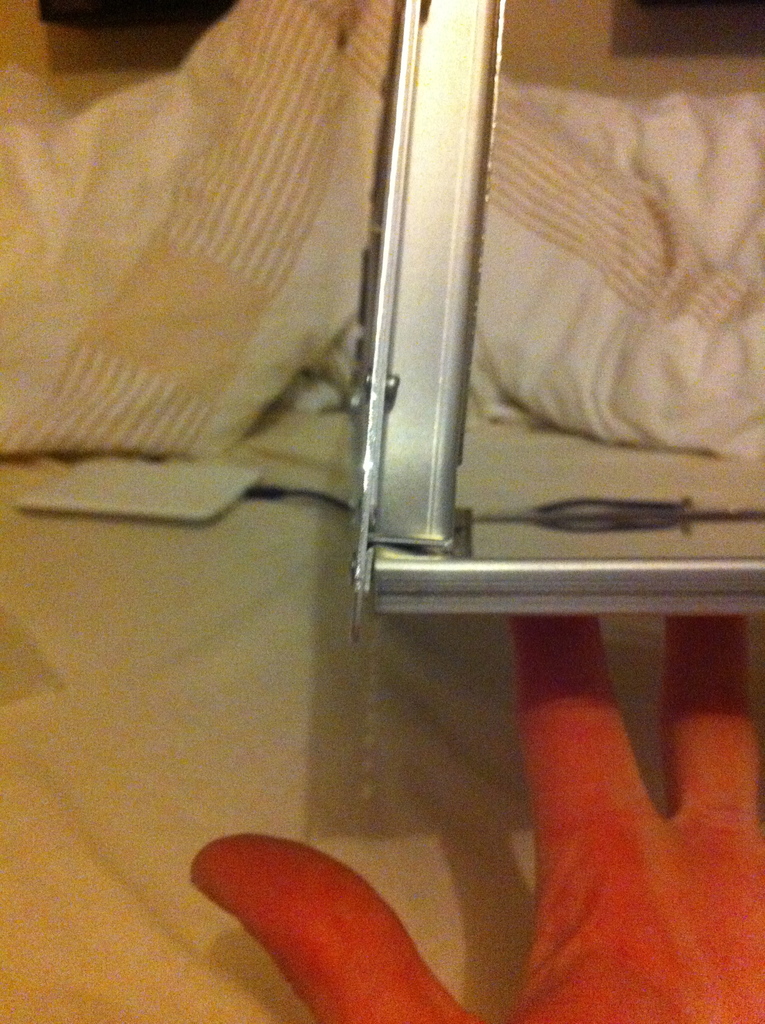
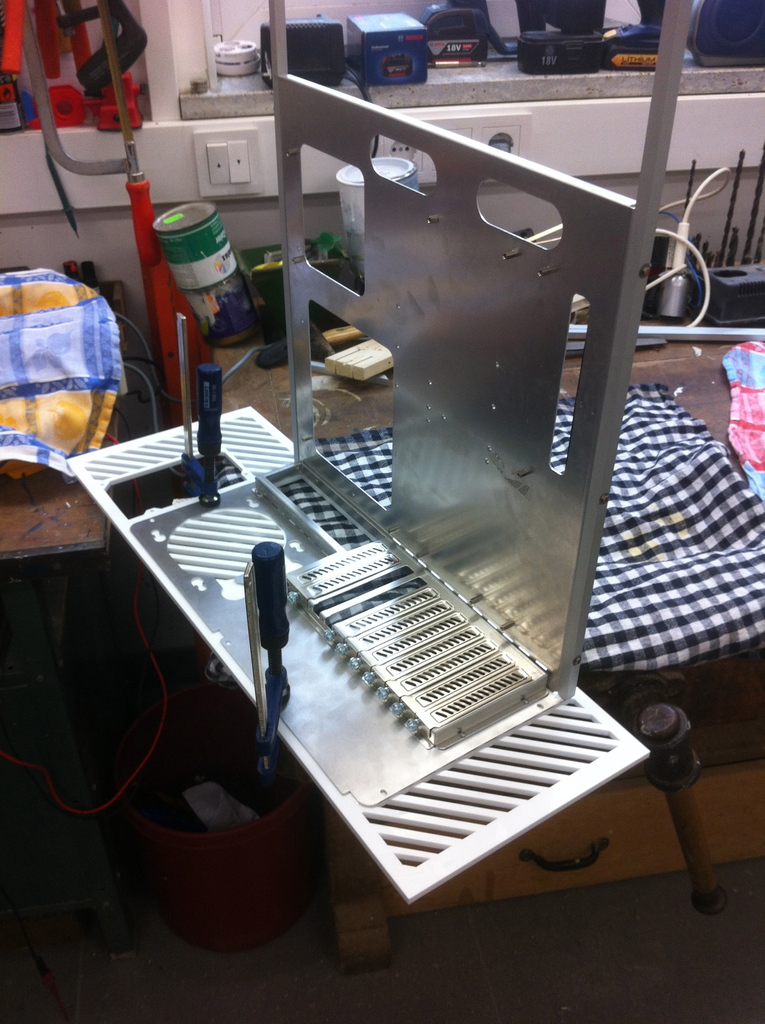
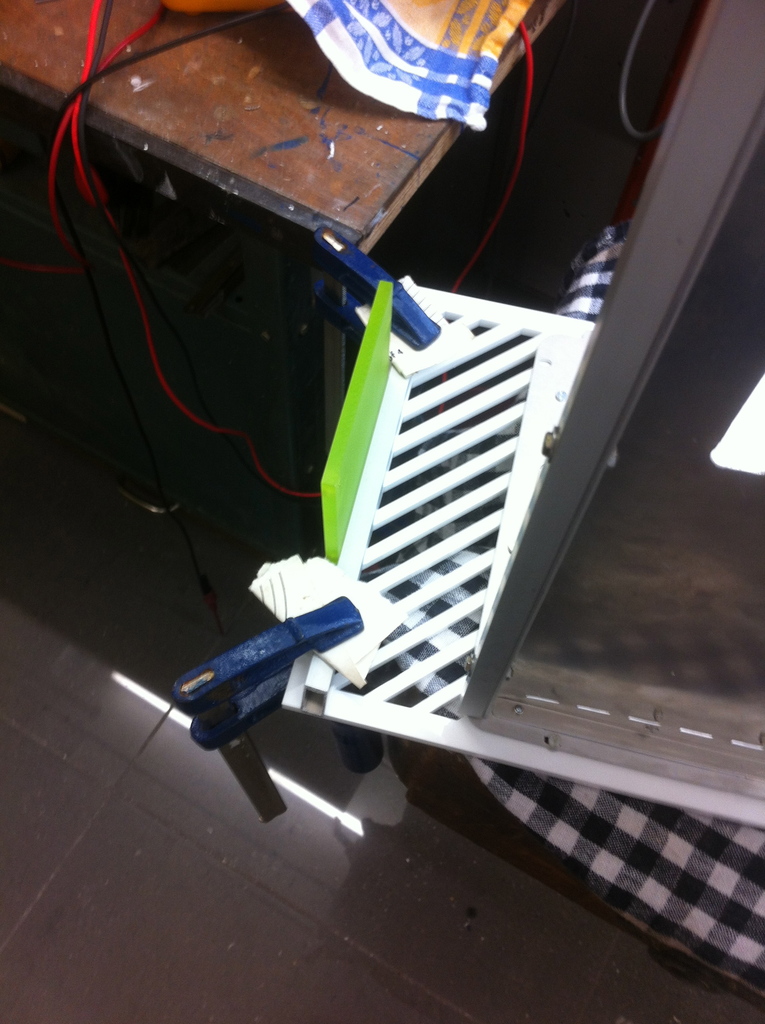
To keep the case angular and solid, i decided to use 10 mm aluminium profiles
as a frame for the top and bottom parts. On miter as good as possible.


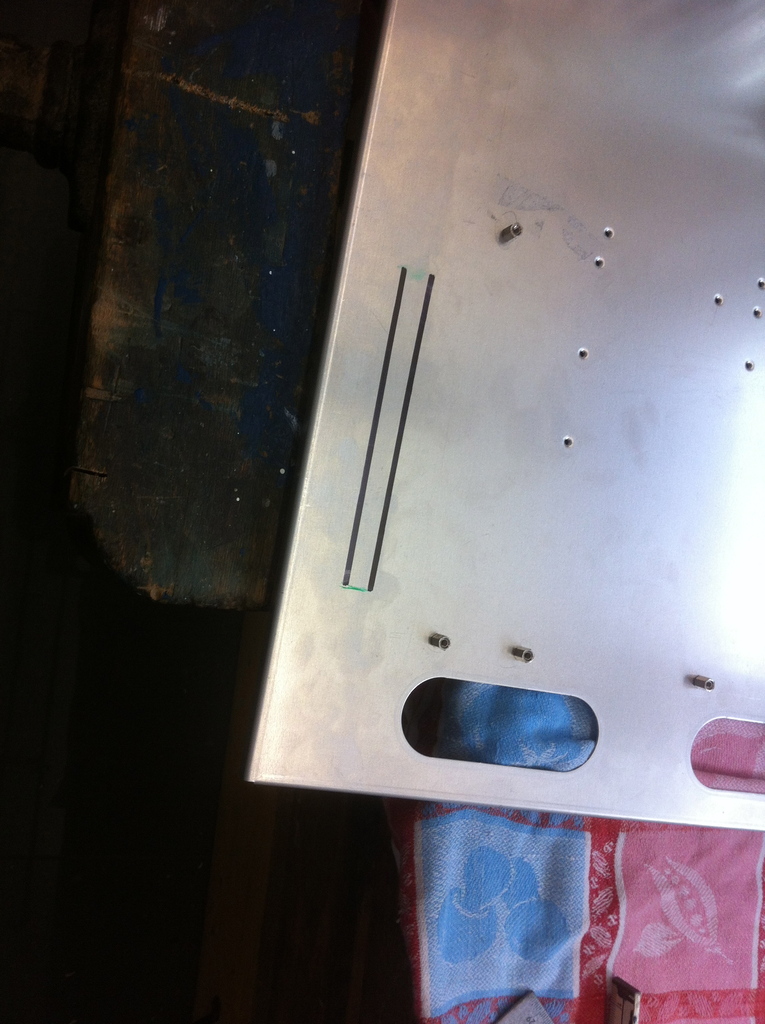
Twice the fun for top and bottom. Drilling the holes, and countersink the 4 mm holes.


Removing the film and thats it, shiny glossy top part.

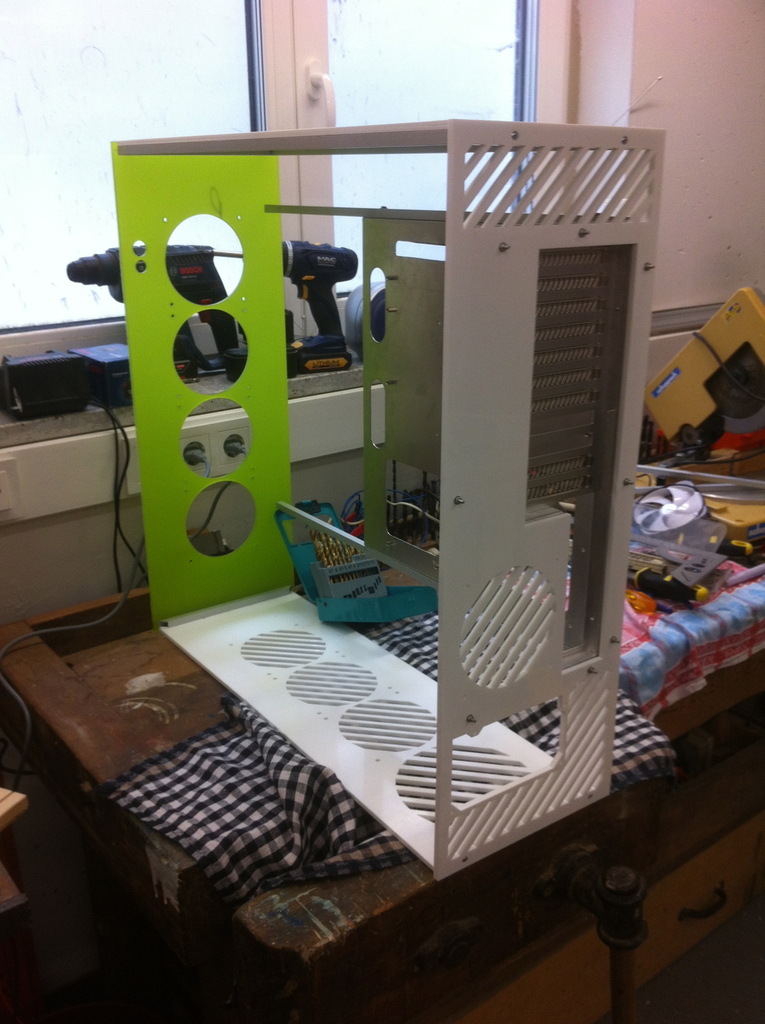
I could start to combine the rest.


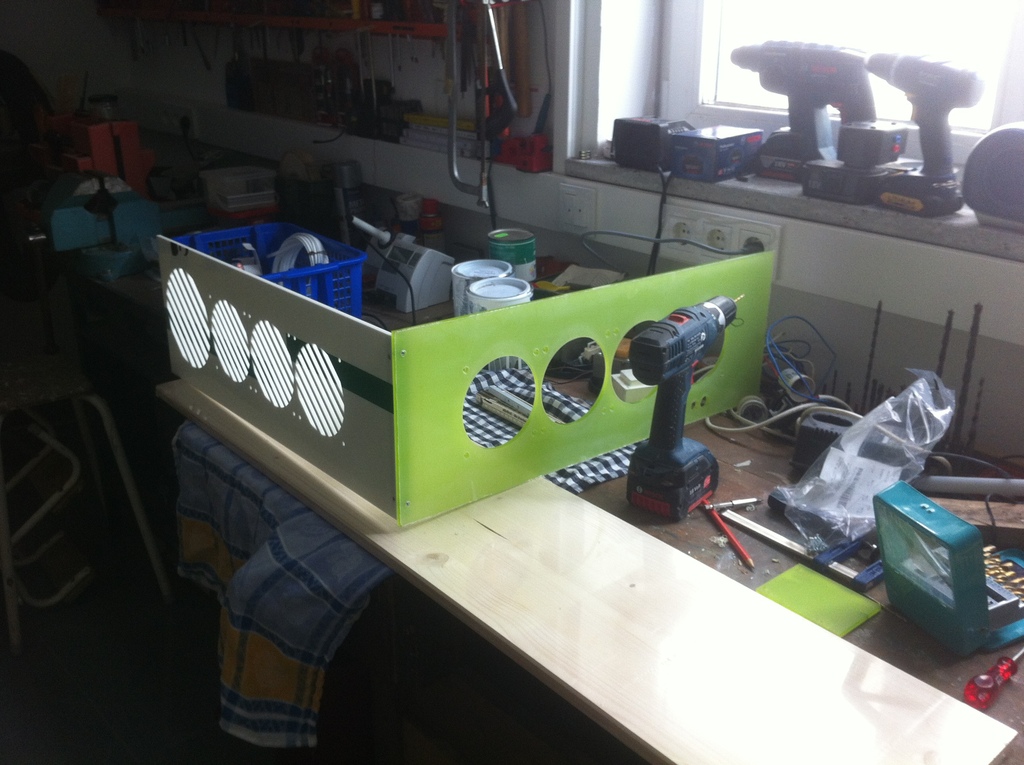
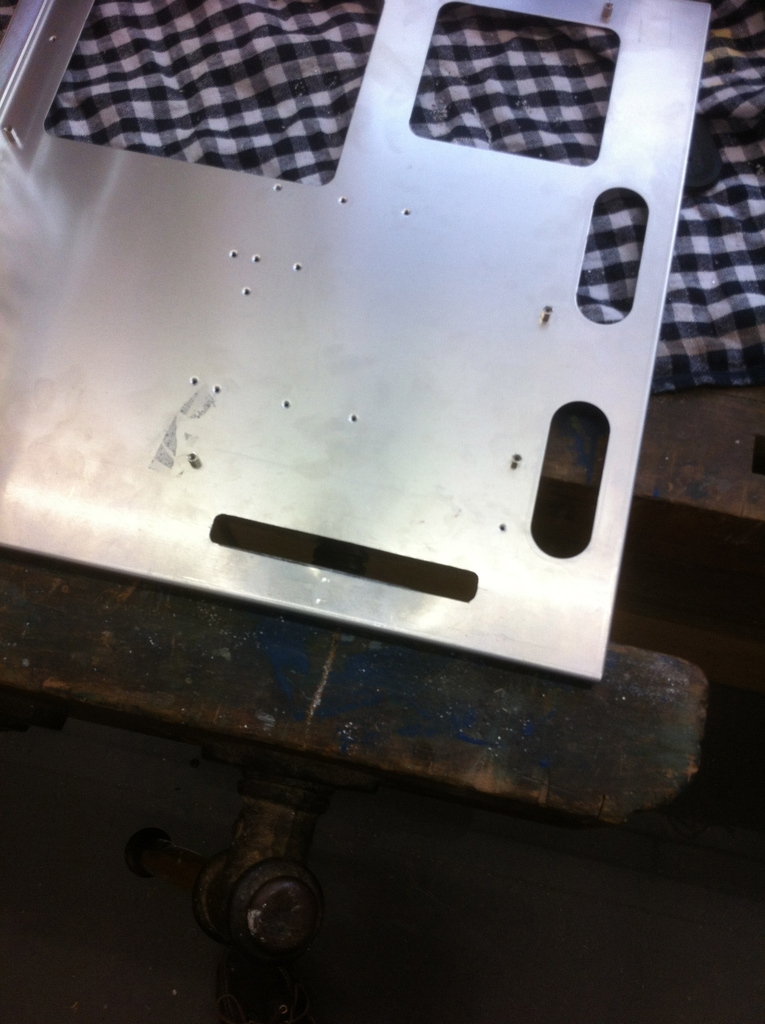
Followed by preparing the tray. Had to add a cable lead-through to have an easier connection of front
panel connectors and graficcards power.


I was using the same profiles to keep the tray horizontal, even with at least 5kg in coolers on it.


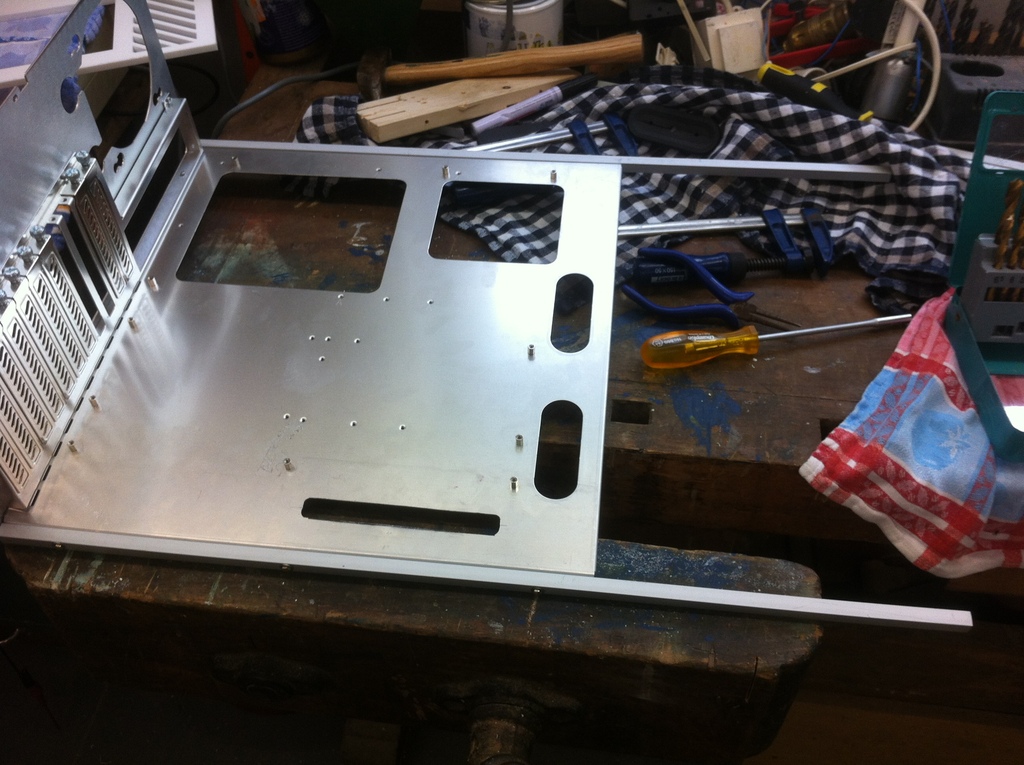
A first test with the acrylic.


Perfect fit...


Adding holes and connect
the parts.


Ill go for shorter screws
here probably later.


Same story for link. Using a 6mm sample to have the right distance.


Two more L-angles to fixate the trayholders.


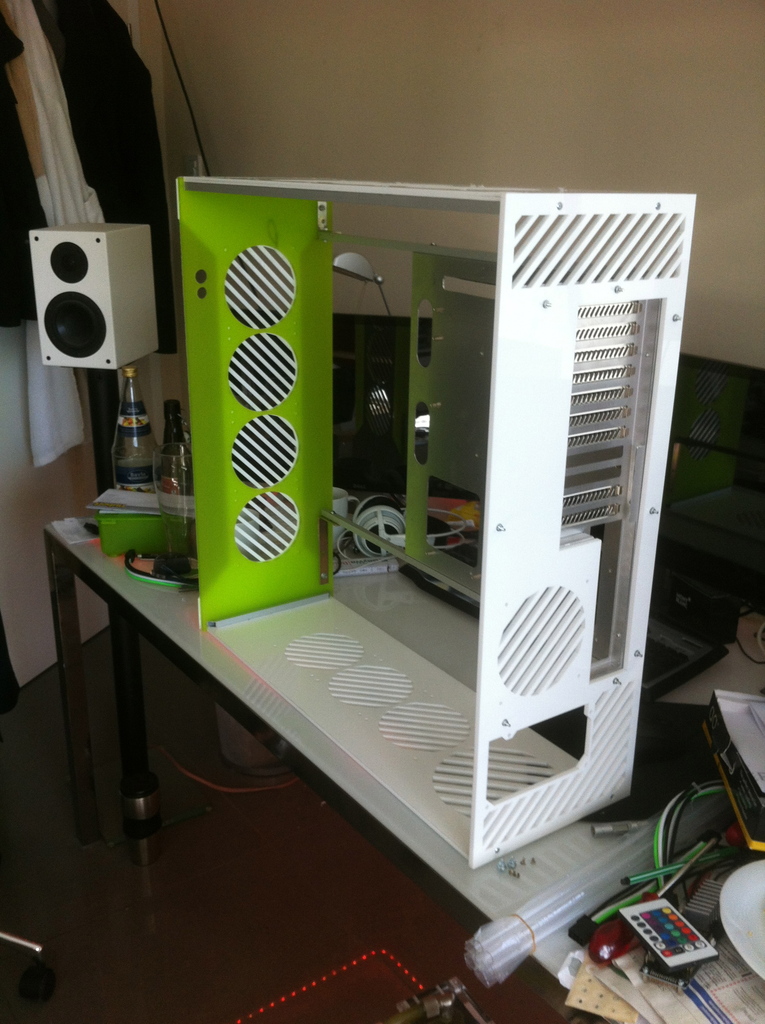
Meanwhile the first sleeves arrived, i think it will fit quite well.


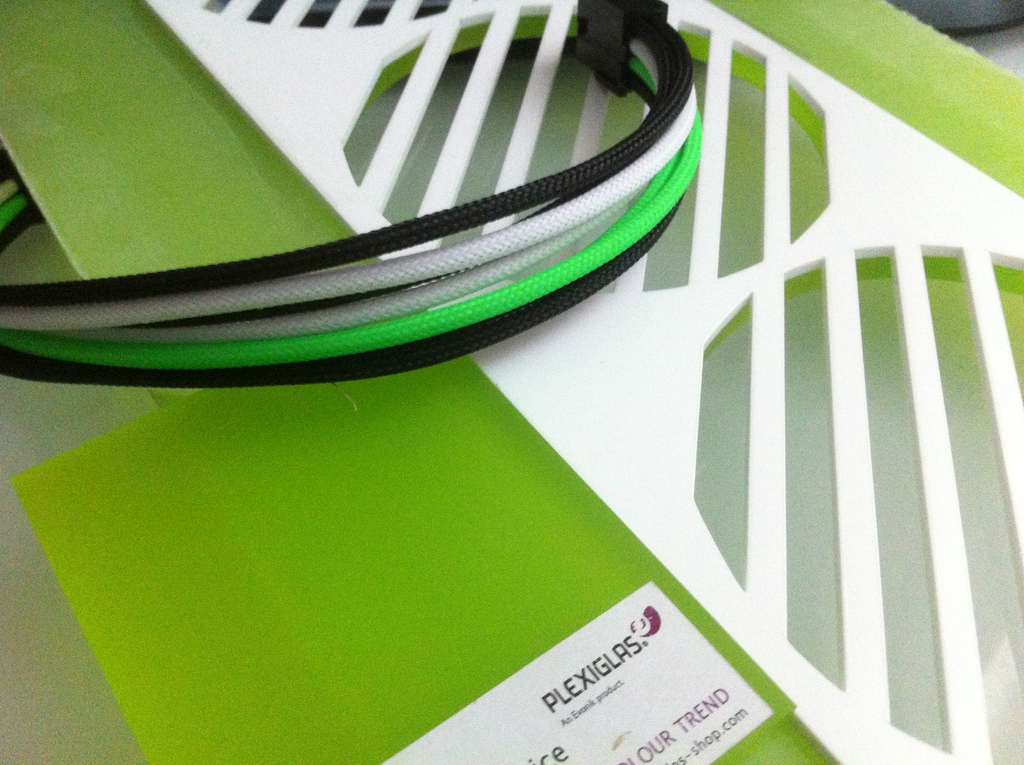
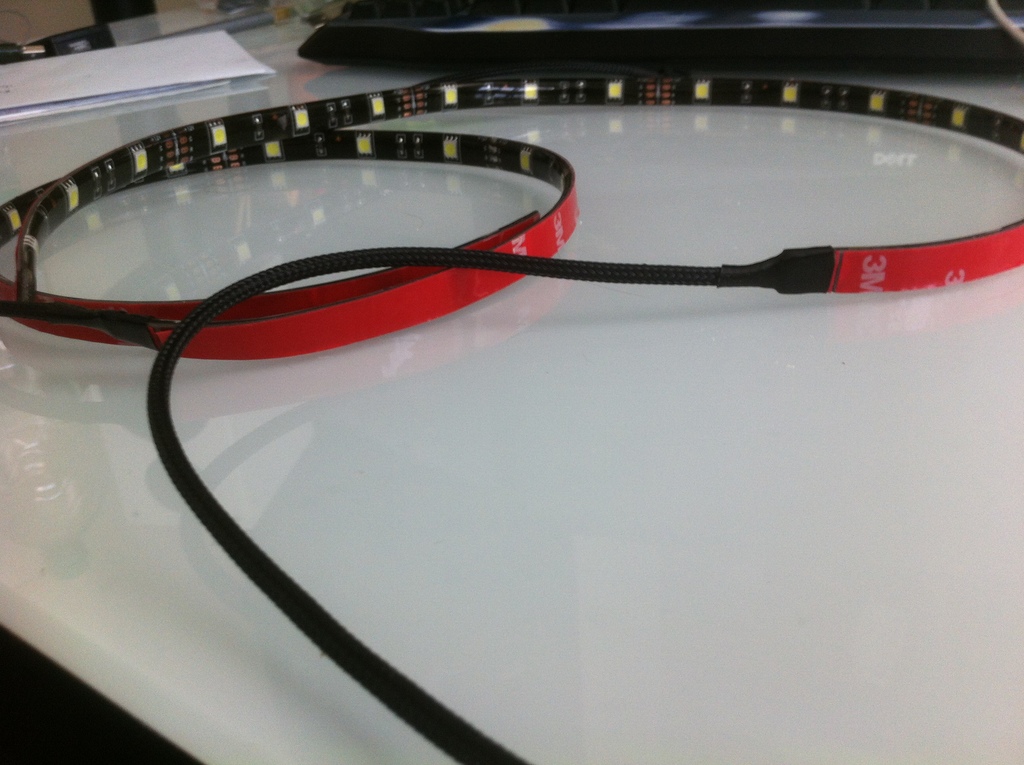
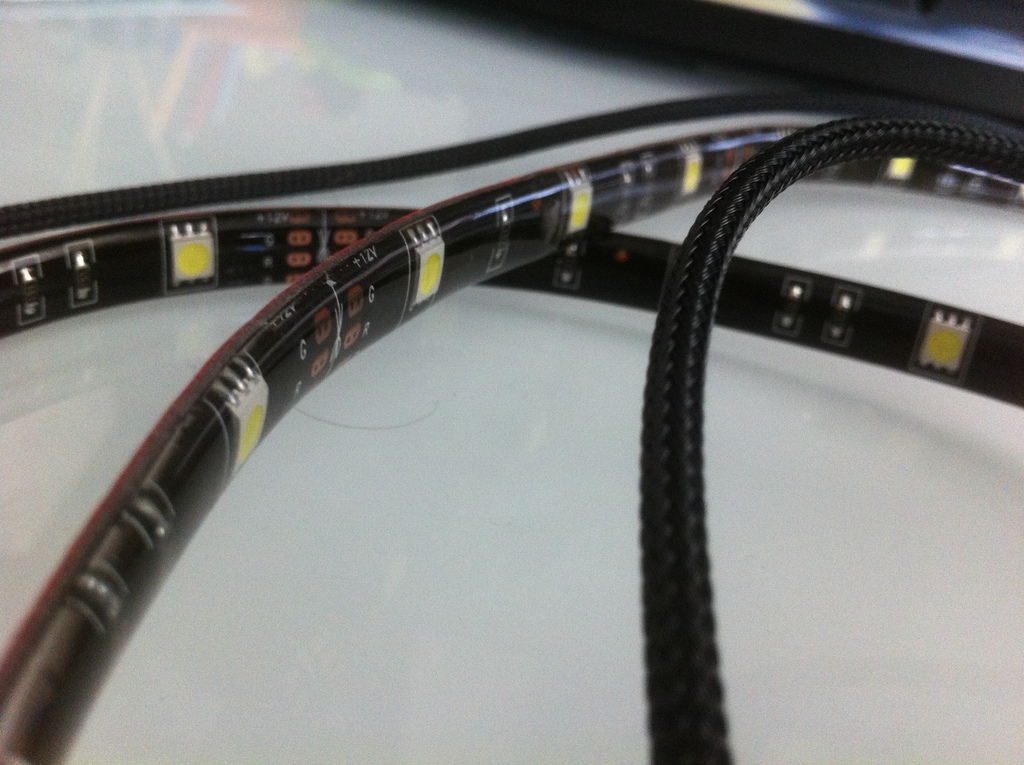
...and Mundis LEDs. Two 60 CM with 15 LEDs each for illumination top and bottom area.


And thats it for now. Will keep you guys updated...
My Current Project: AcryCon, Custom Acrylic HPTX 24 Thread Dual CPU Casecon. Check it out!

Dieser Beitrag wurde bereits 12 mal editiert, zuletzt von »ThomasB« (24. Oktober 2014, 17:19)


ThomasB

Neu Hier!

  • »ThomasB« ist der Autor dieses Themas

Beiträge: 26

Registrierungsdatum: 12. September 2014

Wohnort: Frankonia

  • Nachricht senden

2

Freitag, 12. September 2014, 14:42

Update 1 : Casefeets

Stainless Steel Casefeets, beautiful. Thanks to Markus at this Point!


Update 2:

Acrylic Sidepanels.

Used 6mm Smoked Glass with only 20 ± % Transmission. The case will be nearly looking black, if the PC is turned on, its getting transparent.

Have a look from another project...

Turned off:


Turned on:


As the pc looks like with the panels and feet:


Best regards,
Thomas
My Current Project: AcryCon, Custom Acrylic HPTX 24 Thread Dual CPU Casecon. Check it out!

Dieser Beitrag wurde bereits 2 mal editiert, zuletzt von »ThomasB« (24. Oktober 2014, 17:22)


ThomasB

Neu Hier!

  • »ThomasB« ist der Autor dieses Themas

Beiträge: 26

Registrierungsdatum: 12. September 2014

Wohnort: Frankonia

  • Nachricht senden

3

Freitag, 12. September 2014, 15:34

Der Build wird noch eine Weile dauern. Bin noch beim verhandeln mit Sponsoren, manche, schicken natürlich auch nicht bevor Worklogs veröffentlich werden, um "Betrüger" zu entlarven.

Es kommt also nur noch Update 3 vom Innenleben. Danach geht es wie jeder andere Worklog wieder Stück für Stück weiter. Vielleicht hab ich noch mal das Glück bei SSDs, Ram, NT, Graka ;)

Liebe Grüße.

@Paladin/George, gerne den Rest jetzt löschen, dann update ich auch meinen Post hier....


Update 3:

Since the exterior is nearly finished, besides from a way to fix the panels without any visible screws and the two vandal switches for power and reset(lol windows user), i continued on working on the interior.

First of all, i added other aluminium profiles that will hold the top- and midplate. Get yourself surprised when i finish the last one.


It was a bid tricky to fix the front profiles, since there should be no screws visible on the front panel either.


I decided to cut some transparent holders. They will be covered later, but meanwhile, it works without seeing a single screw.


I cut some holders for the "rear mount" out of a 15 mm profile. They wont be visible later the build either.


Ive cutted the topplate, out of 5 mm clear acrylic...


and started to give it a little try on painting an offcut.


Its white plastic paint, getting very glossy and adding a lot of depth if you paint the acrylic from the backside.

When being sure that the paint doesnt suck, ive painted my topplate too.


and the same awesome effect...


Pictures cant describe how shiny it is, its literally like a mirror.

Added a Moddingstylez and Bitspower Decal too. I have a lot of space on the topplate, since its mainly used for seperating the radiators and providing some space to SSDs and my Aqauero.


Interesting is, that those decals throw a shadow on its own. Looks great imho.

I also used D-C-Fix film to get the motherboard tray white. At this point, i dont know if i want to paint it, not even the color of choice, neither the adornments i want to use. It might be temporary.


Remember the Board is huge, you dont need to cover more than that :D


Ill probably change those stripes to anything else later, but i don't know yet, what it will be.

Best regards,
Thomas
My Current Project: AcryCon, Custom Acrylic HPTX 24 Thread Dual CPU Casecon. Check it out!

Dieser Beitrag wurde bereits 1 mal editiert, zuletzt von »ThomasB« (12. September 2014, 15:54)


Z1 Customs

Wohnt hier!

Beiträge: 482

Registrierungsdatum: 16. Februar 2013

Name: Leonardo Ziaja

Wohnort: Olching

Beruf: Azubi bei Stemmer GmbH | Mini-Job bei REWE

Danksagungen: 20

  • Nachricht senden

4

Freitag, 12. September 2014, 16:25

Wow, klasse Arbeit. Ich find solche Plexi-Cons einfach super.

Muss ich nächstes Jahr auch mal angehen :D

Z1 Customs bei Facebook

Paladin

Wenn I Murksen muss... Aaarrgh..

Beiträge: 12 086

Registrierungsdatum: 18. Juli 2009

Name: Patrick Betz

Wohnort: Simbach bei Landau a. d. Isar

Beruf: Kraftfahrer (Gelernter Schreiner)

Danksagungen: 363

  • Nachricht senden

5

Freitag, 12. September 2014, 17:12

So, auf wunsch hab ich die oberen Beiträge jetzt gelöscht.

Jetzt hier nochmal ein herzliches Willkommen das es auch nicht unter geht :)
COMPLEX-MODS.deMODDING | CONS | CE-MODS
HausModding by Patrick und Sonja

Ein Bayer kann alles, außer Hochdeutsch...... :D


flix

Fühlt sich wohl hier

Beiträge: 233

Registrierungsdatum: 14. Januar 2011

Danksagungen: 9

  • Nachricht senden

6

Freitag, 12. September 2014, 19:12

Ich finde es cool, sieht nur leider aus wie bei Parvum geklaut.
Und zu faul um nochmal auf deutsch zu schreiben? :p :D

Z1 Customs

Wohnt hier!

Beiträge: 482

Registrierungsdatum: 16. Februar 2013

Name: Leonardo Ziaja

Wohnort: Olching

Beruf: Azubi bei Stemmer GmbH | Mini-Job bei REWE

Danksagungen: 20

  • Nachricht senden

7

Freitag, 12. September 2014, 19:19

Geklaut würde ich nicht sagen .. eher inspiriren lassen :D

Man muss aber auch sagen, dass die Parvum Cases toll aussehen ;)

Z1 Customs bei Facebook

ThomasB

Neu Hier!

  • »ThomasB« ist der Autor dieses Themas

Beiträge: 26

Registrierungsdatum: 12. September 2014

Wohnort: Frankonia

  • Nachricht senden

8

Freitag, 12. September 2014, 19:31

Erstmal danke fürs Willkommenheisen!

Flix hat nicht ganz unrecht, ich überlege noch was ich mit der Front mache. Evtl Ecken absägen, Aqauaero integrieren und nen Schlitz für nen Blurayslotin da das System auch als HTPC verwendet wird. Du bist aber natürlich nicht der Erste der sowas sagt.

Für Ideen bin ich gerne offen, dennoch wird es so bleiben dass keine Schraube auf den 3 Sichtseiten zu sehen ist. Hab auch überlegt das Ganze noch folieren zu lassen.

Gruss Thomas
My Current Project: AcryCon, Custom Acrylic HPTX 24 Thread Dual CPU Casecon. Check it out!

Paladin

Wenn I Murksen muss... Aaarrgh..

Beiträge: 12 086

Registrierungsdatum: 18. Juli 2009

Name: Patrick Betz

Wohnort: Simbach bei Landau a. d. Isar

Beruf: Kraftfahrer (Gelernter Schreiner)

Danksagungen: 363

  • Nachricht senden

9

Freitag, 12. September 2014, 19:55

Warum folieren lassen, das kann man doch selber machen?
COMPLEX-MODS.deMODDING | CONS | CE-MODS
HausModding by Patrick und Sonja

Ein Bayer kann alles, außer Hochdeutsch...... :D


flix

Fühlt sich wohl hier

Beiträge: 233

Registrierungsdatum: 14. Januar 2011

Danksagungen: 9

  • Nachricht senden

10

Freitag, 12. September 2014, 19:56

War auch nicht böse gemeint, ich mag das Design ja auch ;)

ThomasB

Neu Hier!

  • »ThomasB« ist der Autor dieses Themas

Beiträge: 26

Registrierungsdatum: 12. September 2014

Wohnort: Frankonia

  • Nachricht senden

11

Freitag, 12. September 2014, 20:05

klar selber, Matthias von Moddingstylez würde mir das nur wieder plottern. Die Vorlage muss ich ja gewohnt liefern.

@Flix: Habs net böse verstanden. Irgendwas werd ich trotzdem noch ändern.
My Current Project: AcryCon, Custom Acrylic HPTX 24 Thread Dual CPU Casecon. Check it out!

JoSo

1. Platz CE-Modding Contest 2014/15

Beiträge: 824

Registrierungsdatum: 18. Dezember 2012

Name: Juri Seibel

Wohnort: Essen

Beruf: Glücksuchender

Danksagungen: 21

  • Nachricht senden

12

Freitag, 12. September 2014, 21:17

Sehr schönes Case! :thumbup: Sieht sehr edel aus!
Plexiglas macht möglich! :thumbsup:

ThomasB

Neu Hier!

  • »ThomasB« ist der Autor dieses Themas

Beiträge: 26

Registrierungsdatum: 12. September 2014

Wohnort: Frankonia

  • Nachricht senden

13

Samstag, 13. September 2014, 07:37

Möglich und teuer :D
My Current Project: AcryCon, Custom Acrylic HPTX 24 Thread Dual CPU Casecon. Check it out!

ThomasB

Neu Hier!

  • »ThomasB« ist der Autor dieses Themas

Beiträge: 26

Registrierungsdatum: 12. September 2014

Wohnort: Frankonia

  • Nachricht senden

14

Freitag, 26. September 2014, 17:51

New Stuff from Aquatuning and EKWB. Thanks to Andreas and Peter! EKWB Stuff will be updated later.


My both ddc will weigh about 2kg, full nickel

Radiators will get painted white.

My Current Project: AcryCon, Custom Acrylic HPTX 24 Thread Dual CPU Casecon. Check it out!

ThomasB

Neu Hier!

  • »ThomasB« ist der Autor dieses Themas

Beiträge: 26

Registrierungsdatum: 12. September 2014

Wohnort: Frankonia

  • Nachricht senden

15

Samstag, 27. September 2014, 12:19


My Current Project: AcryCon, Custom Acrylic HPTX 24 Thread Dual CPU Casecon. Check it out!

ThomasB

Neu Hier!

  • »ThomasB« ist der Autor dieses Themas

Beiträge: 26

Registrierungsdatum: 12. September 2014

Wohnort: Frankonia

  • Nachricht senden

16

Dienstag, 7. Oktober 2014, 08:39

Did the second Layer for the Front:


Will use the same matt acrylic as for the green part, in pumpkin orange. Should suit to the Gigabyte's orange from EK/Mayhems.

I want to go for two led stripes behind the (green) vertical cuttings to illuminate the orange acrylic. Theres at least 3 mm space in depth, should be fine with most stripes.


I actually like those polygons, im still thinking wether i should go for an Aquaero 6 (display) integration on the top or bottom side or if i should make it internally with a second Aquaero 5 Lt. Unfortunately i can't realise the dual loop with two flow sensors and two pumps with a single AE 5 LT.

Regards.
My Current Project: AcryCon, Custom Acrylic HPTX 24 Thread Dual CPU Casecon. Check it out!

ThomasB

Neu Hier!

  • »ThomasB« ist der Autor dieses Themas

Beiträge: 26

Registrierungsdatum: 12. September 2014

Wohnort: Frankonia

  • Nachricht senden

17

Sonntag, 19. Oktober 2014, 14:38

Endlich gutes Wetter :)


Zeug zum Lasern ist auch raus, kommt hoffentlich die kommende Woche.
My Current Project: AcryCon, Custom Acrylic HPTX 24 Thread Dual CPU Casecon. Check it out!

ThomasB

Neu Hier!

  • »ThomasB« ist der Autor dieses Themas

Beiträge: 26

Registrierungsdatum: 12. September 2014

Wohnort: Frankonia

  • Nachricht senden

18

Freitag, 24. Oktober 2014, 17:22

Updated:

My Current Project: AcryCon, Custom Acrylic HPTX 24 Thread Dual CPU Casecon. Check it out!

Paladin

Wenn I Murksen muss... Aaarrgh..

Beiträge: 12 086

Registrierungsdatum: 18. Juli 2009

Name: Patrick Betz

Wohnort: Simbach bei Landau a. d. Isar

Beruf: Kraftfahrer (Gelernter Schreiner)

Danksagungen: 363

  • Nachricht senden

19

Sonntag, 26. Oktober 2014, 08:42

War seit 27.09 im Urlaub, und hab danach nicht alle threads angeschaut. Ist ja einiges passiert. Schaut gut aus, hat was.
COMPLEX-MODS.deMODDING | CONS | CE-MODS
HausModding by Patrick und Sonja

Ein Bayer kann alles, außer Hochdeutsch...... :D


ThomasB

Neu Hier!

  • »ThomasB« ist der Autor dieses Themas

Beiträge: 26

Registrierungsdatum: 12. September 2014

Wohnort: Frankonia

  • Nachricht senden

20

Sonntag, 26. Oktober 2014, 09:06

Das grün wirkt natürlich etwas dunkel, das orange zu hell da die Folie noch drauf ist.

Aber noch immer nicht final, ich denke ich säge die Gitter jetzt hinter den Polygonen aus.

Die Tage kommt nochn Update mit den Radis, muss den 480 leider nochmal lackieren an 2-3 Stellen. Dazu sind die Kabelcover fertig und ich kann anfangen meinen AGB zu bauen. Da muss ich mir aber noch was einfallen lassen.


My Current Project: AcryCon, Custom Acrylic HPTX 24 Thread Dual CPU Casecon. Check it out!